Securing Admin Pages with ASP.NET and Azure AD
Posted by Dylan Beattie on 25 January 2022 • permalinkI recently had to implement an authentication pattern which I must have built a dozen times over the course of my career, on various platforms ranging from classic ASP to Ruby on Rails. This time around it’s in ASP.NET Core on .NET Core 3.1, and although all the individual components are easy enough to plug in, I couldn’t find a resource describing how to implement this exact use case, so here’s how I did it.
The Scenario
- There’s a website at https://example.com/ that’s available to the general public. No security, no user registration, no authentication.
- There is an admin area at https://example.com/admin which is only accessible to employees of Example Company Ltd
- We can assume that anybody with an @example.com email address is an employee
What makes this a little easier than the Olden Days is that Example Company Ltd runs all their email on Office 365, so there’s an Azure OpenID Connect endpoint I can use to authenticate users. What makes it a little more difficult is that that although Example Company Ltd use Office 365 and they all have Microsoft accounts, they don’t actually have an Azure subscription (and don’t want to set one up), so the organisation that’s managing the Azure app registrations (i.e. me) isn’t the same as the organisation that employs the authorised users.
Anyway. Here’s how it all works. You’ll need to register your app in the App registration area of the Azure dashboard, which you should be able to find here. You’ll also need a section in appsettings.json called "AzureAd":
{
  "AzureAd": {
    "Instance": "https://login.microsoftonline.com/",
    "Domain": "example.com",
    "ClientId": "<YOUR-AZURE-REGISTERED-APP-CLIENT-ID>",
    "TenantId":  "common"
  }
}
The ClientId there is the Application (client) Id from the Azure dashboard.
Install the NuGet packages for the Microsoft.Identity.Web middleware:
dotnet add package Microsoft.Identity.Web
dotnet add package Microsoft.Identity.Web.UI
Then we need to add a few things to our Startup.cs:
Define a string constant for the policy name, and another one for the authorised domain:
private const string EMPLOYEES_ONLY_POLICY = "EmployeesOnly";
private const string AUTHORIZED_DOMAIN = "example.com";
Next, add a chunk of code to the top of ConfigureServices:
var azureConfig = Configuration.GetSection("AzureAd");
services.AddAuthentication(OpenIdConnectDefaults.AuthenticationScheme)
  .AddMicrosoftIdentityWebApp(options => {
    options.ClientId = azureConfig["ClientId"];
    options.Instance = azureConfig["Instance"];
    options.TenantId = azureConfig["TenantId"];
    options.Events.OnRedirectToIdentityProvider += context => {
      context.ProtocolMessage.DomainHint = AUTHORIZED_DOMAIN;
      return Task.CompletedTask;
    };
});
There’s an overload for AddMicrosoftIdentityWebApp which lets you just pass in the config section, but I couldn’t find any way to do this and then register the event handler for OnRedirectToIdentityProvider, which we’re using to pass a DomainHint to the Azure/Microsoft login endpoint. This means if the current user has ever signed in using an @example.com email address, it’ll default to using that one in future, which makes for a smoother login process.
Where we add Razor pages to our app, we’re adding the Microsoft Identity UI, which gives us prebaked UI bits like the “access denied” page:
services.AddRazorPages().AddMicrosoftIdentityUI();
Next, we define our authorization policy, but we don’t actually attach it to anything yet. This means that all our app content will be available by default (so we don’t need to go around putting [AllowAnonymous] on all our controllers), but we can lock down specific areas, controllers or actions by attaching this policy to them. RequireAssertion here is the extension point we can use to run arbitrary code checks on the authorization context - in this example, verifying that the user’s identity name (which is their email address when using Azure AD) ends with the authorized domain.
services.AddAuthorization(options => {
  options.AddPolicy(EMPLOYEES_ONLY_POLICY, new AuthorizationPolicyBuilder()
    .RequireAuthenticatedUser()
    .RequireEmailDomain(AUTHORIZED_DOMAIN)
    .Build());
RequireEmailDomain isn’t one of the policies provided out of the box, but that’s no problem; we can add it using an extension method:
public static class AuthorizationPolicyExtensions {
  public static AuthorizationPolicyBuilder RequireEmailDomain(
    this AuthorizationPolicyBuilder builder, string domain
  ) {
    domain = domain.StartsWith("@") ? domain : $"@{domain}";
    return builder.RequireAssertion(ctx => {
      var email = ctx.User?.Identity?.Name ?? "";
      return email.EndsWith(domain);
    });
  }
}
ℹ️ Notice that we’re prepending an @-sign here. If we omitted this, you could sign in by registering a domain like
fakeexample.comand setting up a Microsoft login using that domain, because"[email protected]".EndsWith("example.com")will return true.
Finally, in the Configure method, we need to make sure the app is using both authentication and authorisation (as an aside, don’t you love how clear this syntax is?)
app.UseAuthentication();
app.UseAuthorization();
And then map a controller route for our secure area, which includes the authorization policy:
app.UseEndpoints(endpoints => {

    endpoints.MapControllerRoute("secure",
        "{area:exists}/{controller=Home}/{action=Index}/{id?}")
        .RequireAuthorization(EMPLOYEES_ONLY_POLICY);

    endpoints.MapControllerRoute(
        name: "default",
        pattern: "{controller=Home}/{action=Index}/{id?}");
    endpoints.MapRazorPages();
});
This means any controllers and actions that are part of the secure area will have this authorization policy applied, and the rest of the app is still available to unauthenticated and unauthorised users.
Here’s the whole Startup.cs with those extra bits in place:
// Startup.cs

using System.Threading.Tasks;
using Microsoft.AspNetCore.Authentication.OpenIdConnect;
using Microsoft.AspNetCore.Authorization;
using Microsoft.Identity.Web;
using Microsoft.Identity.Web.UI;
using Microsoft.AspNetCore.Builder;
using Microsoft.AspNetCore.Hosting;
using Microsoft.Extensions.Configuration;
using Microsoft.Extensions.DependencyInjection;
using Microsoft.Extensions.Hosting;

namespace WebApp_OpenIDConnect_DotNet {
  public class Startup {

    const string EMPLOYEES_ONLY_POLICY = "EmployeesOnly";
    private const string AUTHORIZED_DOMAIN = "example.com";

    public Startup(IConfiguration configuration) {
      Configuration = configuration;
    }

    public IConfiguration Configuration { get; }

    // This method gets called by the runtime. Use this method to add services to the container.
    // <Configure_service_ref_for_docs_ms>
    public void ConfigureServices(IServiceCollection services) {
      var azureConfig = Configuration.GetSection("AzureAd");
      services.AddAuthentication(OpenIdConnectDefaults.AuthenticationScheme)
        .AddMicrosoftIdentityWebApp(options => {
          options.ClientId = azureConfig["ClientId"];
          options.Instance = azureConfig["Instance"];
          options.TenantId = azureConfig["TenantId"];
          options.Events.OnRedirectToIdentityProvider += context => {
            context.ProtocolMessage.DomainHint = AUTHORIZED_DOMAIN;
            return Task.CompletedTask;
          };
        });

      services.AddControllersWithViews();
      services.AddRazorPages().AddMicrosoftIdentityUI();
      services.AddAuthorization(options => {
        options.AddPolicy(EMPLOYEES_ONLY_POLICY, new AuthorizationPolicyBuilder()
          .RequireAuthenticatedUser()
          .RequireEmailDomain(AUTHORIZED_DOMAIN)
          .Build());
      });
    }

    public void Configure(IApplicationBuilder app, IWebHostEnvironment env) {
      if (env.IsDevelopment()) {
        app.UseDeveloperExceptionPage();
      } else {
        app.UseExceptionHandler("/Home/Error");
        app.UseHsts();
      }

      app.UseHttpsRedirection();
      app.UseStaticFiles();

      app.UseRouting();
      app.UseAuthentication();
      app.UseAuthorization();

      app.UseEndpoints(endpoints => {
        endpoints.MapControllerRoute("admin", "{area=admin:exists}/{controller=Home}/{action=Index}/{id?}")
          .RequireAuthorization(EMPLOYEES_ONLY_POLICY);
        endpoints.MapControllerRoute(
          name: "default",
          pattern: "{controller=Home}/{action=Index}/{id?}");
        endpoints.MapRazorPages();
      });
    }
  }

  public static class AuthorizationPolicyExtensions {
    public static AuthorizationPolicyBuilder RequireEmailDomain(
      this AuthorizationPolicyBuilder builder, string domain
    ) {
      domain = domain.StartsWith("@") ? domain : $"@{domain}";
      return builder.RequireAssertion(ctx => {
        var email = ctx.User?.Identity?.Name ?? "";
        return email.EndsWith(domain);
      });
    }
  }
}
One thing I haven’t figured out yet is how to override the built-in bits of UI for things like “Access Denied”. The policy works fine, but if you sign in with a valid Microsoft account that isn’t a @example.com email, you get this generic “Access Denied” message:
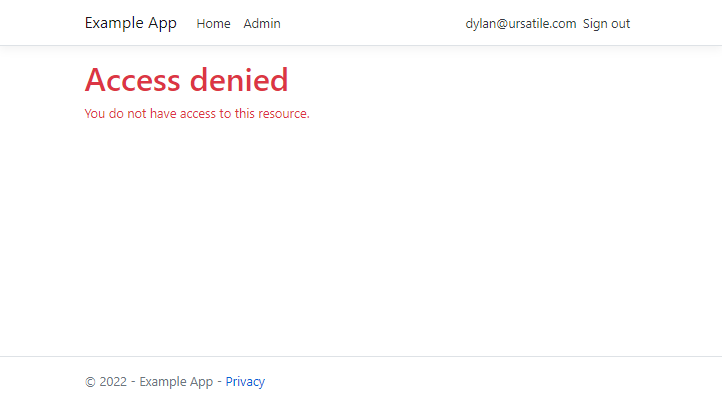
It’d be nice to replace this with something that explains only people with @example.com email addresses are allowed in.
I also have no idea yet how you go about testing this - this sort of federated authentication is very much in the “sufficiently advanced technology and therefore indistinguishable from magic” category, and security has always been hard to test even when it doesn’t involve exchanging encrypted tokens with Actual Microsoft Infrastructure.
But, hey, it works, and only adds a few lines of code. I’m quite happy with that – and the fact that all the authentication, password resets, locked accounts, setting up accounts for new users is all running on somebody else’s stack?
That, my friends, is what we call progress.