Microphone Tips for Remote Presentations
Posted by Dylan Beattie on 12 May 2020 • permalinkIn my last post, I shared some tips for giving online presentations. In this talk, we’re going to completely nerd out about microphones, and how to get the best possible results out of the equipment you already have.

Audio quality is essential to connecting with your audience when you’re presenting remotely. A conference is about speakers giving talks. Not looks, not stands, not dances – talks. We are speakers, we are there to talk, and our audiences are there to listen. If your audience can’t hear you, you’ve lost them, no matter how beautiful your slides or or how many hours you’ve spent practising… and when you’re presenting online, your microphone is the Jesus nut – the single point of failure that can bring the whole thing crashing down.
You can easily spend a fortune on specialist microphones, but if you don’t know what you’re doing, it won’t make any difference – and if you do know what you’re doing, you can get great results from relatively inexpensive kit.
Your ears never blink
Humans are good at dealing with visual clutter. We can focus our eyes, look at the things we care about and ignore unnecessary background detail - check out this video for a remarkable demonstration of this.
Audio isn’t like that. Your ears never blink. We hear every detail, every keystroke and passing car and buzzing fluorescent lamp - and so when we’re doing presentations, it’s absolutely vital to understand how much background noise and interference your mic is picking up.
Before we go any further, take a look at this video. I recorded myself using seven different microphones at the same time, so you can hear for yourself how the different microphones sound, and how they cope with different kinds of interference and background noise.
Microphone placement
You want your mic as close to your mouth as possible; 5 cm (2”) to 25 cm (10”) is ideal. You also want to avoid moving around too much relative to the microphone.
Headset mics are great, because they keep the microphone in the same position relative to your mouth – you can turn your head, walk around, and they still sound good. Lavalier mics – the ones that clip into your clothes – and phone headsets also work pretty well, and you can stand up and walk around, as long as you remember not to turn your head. If you’re using a fixed mic on a stand, you’ll need to sit very, very still to get the best results from it.
Background noise and isolation
You’ll notice in the video that the built-in mic in the Surface Pro sounds really good, right up until I start typing. It’s actually a really good mic, but because it’s built in to the device, it’s in the worst possible position – it’s on the desk, quite a long way from my mouth, right next to my keyboard, and it’ll pick up every bit of vibration and background noise.
This isn’t just a problem with built-in mics – I’ve seen folks spend quite a lot of money on specialist USB microphones like the Blue Yeti, and then sit them on the desk right next to their mechanical keyboard and wonder why they’re not getting a good sound.
If your mic is attached to your clothing, or you’re using a phone headset, watch out for clothing rustle – check out this article from Rode about lavalier mic placement, which has some excellent tips.
Connection
If you’re going shopping, you’ll need to consider how your mic connects to your computer. USB headsets will just plug straight in, and the headphone jack in most modern laptops is compatible with the TRRS plugs used on phone headsets.
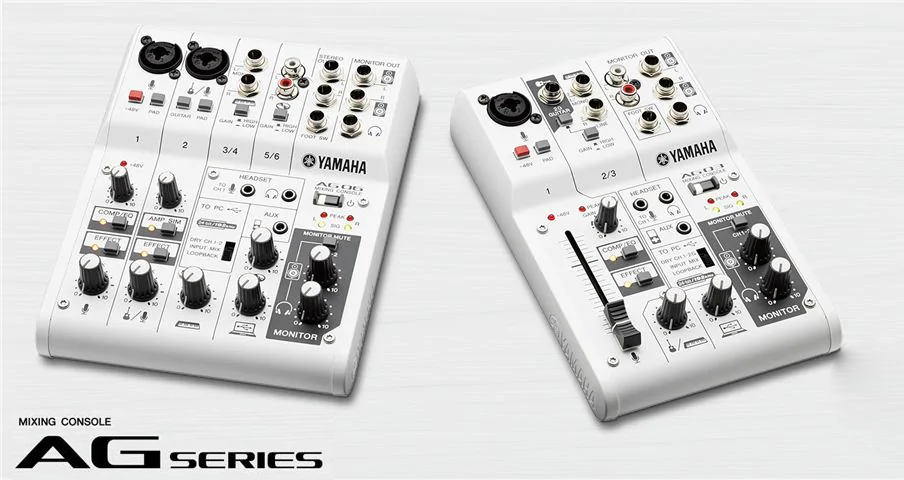
If you’re going for a standalone mic or a wireless system, you’ll need an audio interface to connect it to your computer. I highly recommend the Yamaha AG03 and AG06, for this – they’re great quality, incredibly versatile and easy to use.

Listen to yourself
The golden rule with any microphone, though is: listen to yourself. Install some audio recording software – Audacity is free, open-source and cross-platform – make some recordings, listen back to yourself (and make sure to listen through headphones.) Record 30 seconds of silence and listen back to it. What do you hear? Traffic noise? Dishwasher? Mouse clicks? If you can hear it, your audience will hear it. You might not able to eliminate background noise entirely, but figure out what you can to reduce it – close windows, close doors, take off your shoes, switch off the aircon. Make yourself a pre-flight checklist.
Now record 30 seconds of you speaking. at the same volume you’d use when giving a talk, and listen back to that. Try reading these ten sentences out loud, then listen back and see what you sound like:
- The dark pot hung in the front closet.
- Carry the pail to the wall and spill it there.
- The train brought our hero to the big town.
- We are sure that one war is enough.
- Grey paint stretched for miles around.
- The rude laugh filled the empty room.
- High seats are best for football fans.
- Tea served from the brown jug is tasty.
- A dash of pepper spoils beef stew.
- A zestful food is the hot-cross bun.
This is one of 72 lists of stock phrases known as the “Harvard Sentences”:
“a collection of phonetically balanced sentences that measure a large range of different qualities in the human voice. These were originally published in 1969 as the Institute of Electrical and Electronics Engineers recommended practice for speech quality measurements.”
– you can find the whole list online here.
If you hear loud pop or thud on words like ‘pepper’ and ‘bubble’, that’s called a plosive – it’s the mic picking up the sharp release of breath that happens when we pronounce letters like ‘b’ and ‘p’. See if you can move the mic downwards or to the side slightly so that it isn’t directly in front of your mouth. If you hear hissing or whistling on words like ‘stew’ and ‘seats’, that’s called sibilance – try moving the mic a little further away from your mouth.
Play with the distance until you’ve got a good clear voice with minimal background noise, but you’re not getting any hissing or popping. If your mic has a volume control, turn it up until you’re about as loud as you can go without hearing any distortion or seeing any warning lights, then back it off about 5%. Do this every time you change anything – move the furniture, get a new mic, install new drivers. And remember the golden rule: listen to yourself. That’s what your audience is going to be listening to for an hour – if it doesn’t sound good in your own room, on your own headphones, there’s no way that sending it halfway around the world on a video call is going to make it any better.
Conclusions
A USB headset gives the best balance of quality and price – you can get excellent audio quality from a £20 headset, and it won’t pick up things like typing and background noise. The only drawbacks here are that you’ve gotta have a big chunky thing on your head, and if it’s wired, you can’t get up and walk around. If you’re going to be sat a desk for your recordings, and don’t mind how it looks (or you’re not going to be on video), go for one of these.
If all you have is a phone headset, use it – but be very careful not to move around too much. You’ll get good results if you sit still and speak clearly, but watch out for the mic rubbing on your clothes and be careful you don’t snag the cable.
If you’re using a fixed mic like the RØDE Podcaster or the Blue Yeti, make sure it’s mounted high and insulated from vibration – ideally on a proper microphone stand with a shock mount.
If you have no choice but to use the mic built in to your laptop, work out how to isolate it as much as possible from background noise. If your presentation doesn’t involve any typing, clicking or anything, you’ll probably be OK. If you need to type, try resting the laptop on a pillow or a cushion - maybe even use an external keyboard as well to reduce the typing noise.
And remember: you don’t need to spend a lot of money on specialist equipment. Start with what you’ve already got, make some recordings, listen to yourself, figure out what’s not working, fix it, repeat.
