Here's my five latest blog posts - or you can browse a complete archive of all my posts
since 2008.
“Like Somebody’s Been Practising Prison Tattoos on a Dwarf Aubergine”
Posted by Dylan Beattie on 15 May 2026
•
permalink
Krakow airport. Or, to give it its full official name, Krakow Balice John Paul II International Airport. Or, to give it its full name in Polish, which we probably should, because it is in Poland, Międzynarodowy Port Lotniczy im. Jana Pawła II Kraków-Balice. Or, to give it as much of its full name as you can read in the list of matches when you search for “airport” on Uber, “Międzynarodowy Port Lotniczy im” - and yes, that’s a single-line text field with no horizontal scrolling support, which is only the third-worst piece of UX I’ve seen caused by a combination of local place names, bad UI design, and inconsistent localisation.
The worst, if you’re wondering, was Sydney, where Charles Kingsland Smith International Airport was listed in the Opal ticket machines as “International”, which was all the more infuriating because they didn’t even have a language barrier to contend with and still managed to fuck it up. The second-worst is trying to buy a train ticket to Cologne (Köln) on Deutsche Bahn’s ticket app, which requires you to know that when Germans translate German into English, Köln becomes Koeln and no alternative spellings or translations will be considered.
Anyway. Krakow airport. A man in a black hat and leather jacket walks very slowly towards the passport gates. He’s walking slowly because yesterday a taxi driver ran over his foot, which is quite remarkable considering that he was actually inside the taxi when this happened. Well, most of him was. His left foot was very much still on the road outside the car and not expecting to become an impromptu chock for a late-model Toyota Corolla, but Polish cab drivers are very efficient people and often so keen to whisk their passengers to their destination that they will often start driving before the doors are closed. If they’ve illegally stopped in a no-stopping zone and the cab driver behind them is honking his horn, that only increases their sense of urgency.
(Yes, a cab ran over my foot, at 08:30 yesterday, on the way to Geecon to give the opening keynote. Actually, “ran over my foot” isn’t 100% accurate, but the injury cannot be properly described without some diagrams. Fortunately I was wearing the Karrimor Skiddaw DD heavy-duty tactical boot, and so I escaped with some excruciatingly painful bruising and a mild case of shock. Did the keynote anyway because I’m a goddamned professional. Also, excellent boots. A+++ would buy again.)
Now, if you asked an international airport “hey, what do you do for fun?”, it would reply “ooh, you know… reading, dancing, but my favourite thing of all is taking a relatively short walk across an unobstructed area, like the straight line from, say, the corridor to the passport control desk, and using those weird poles-connected-by-bits-of-seatbelt to make the walk as long as possible so that if five hundred people show up unexpectedly they can be stacked into a neat fractal structure instead of milling about everywhere!”
Airports LOVE that shit.
Which is fine when there *are* five hundred people waiting to clear passport control… but when there’s only half a dozen of you, it’s just a lot of pointless steps for no reason. Alas, my Polish isn’t up to explaining “an idiot taxi driver ran over my foot so I am circumventing your crowd control barriers because walking is extremely painful and there’s no crowd here to control anyway”, and so I walk the long way around. It takes a while, but I finally get to the front of the nonexistent line, and this is where it gets entertaining
There’s this jolly thing called Schengen. It’s a bit like the Kruger game park: you only deal with border control on the way in and the way out, and once you’re inside you can sort of go wherever you like and amble gently from one country to another. (In most other respects it is not like the Kruger. For starters, it has a lot more Belgians and not nearly so many elephants.)
Since October 2025, the collective governments of the Schengen-area countries (which is basically the European Union plus a few countries like Norway and Switzerland that were rich enough to get included without actually joining the EU proper) have been rolling out a new electronic entry system, called - wait for it, you’ll like this - the Electronic Entry System. EES. The idea is that when visitors enter or leave the Schengen area, their details and photographs and fingerprints get stored in some sort of giant computer thing so you don’t need passport stamps any more.
I crossed the border on Monday, in London, at the Eurostar terminal in St Pancras, where at any given time a handful of extremely bored-looking French police officers will glance at passports and stamp you into Schengen. Except, of course, now there’s no stamps. “Oh”, thinks me, “they must have the new computer thing.” I ask politely “no more stamps? Even if I’m not coming home on Eurostar?” “No, Monsieur, no stamps! Bon voyage!”
(Astute readers with experience of multinational IT projects will be experiencing a sort of spidey sense tingling feeling right about this point.)
(Anybody who has ever been wished “bon voyage” by a member of the gendarmerie will also be experiencing a sort of spidey sense tingling feeling right about this point.)
(If you are in both of these categories, what you are currently experiencing is a “double tingle”. You’re welcome.)
So I go to Brussels, and on to Antwerp, and have a jolly time at Techorama, and fly from Brussels to Krakow, and have another jolly time at Geecon apart from the bit with the taxi and the foot, and now a patient and polite and clearly very confused Polish passport control officer is alternately staring at my passport and her computer screen and trying to figure just how exactly the fuck I got here. Explaining that I entered Schengen in London does not help matters, but when it becomes apparent that the reason I have neither a passport stamp nor a computer record of my entry is something to do with The French, she becomes extremely helpful and asks if I still have my Eurostar ticket, and sure enough there it is saved on my phone, and that’s deemed proof enough that I’m not some sort of spy and I can go home after all.
Until Monday, that is. On Monday I have to go to Luton, because on Tuesday I fly to Timisoara at 8am because Past Dylan is an Asshole who makes Terrible Choices, and the only way to be in Luton at 05:30 is to be there the previous night, so I shall be adding the Luton Airport Ibis to the list of illustrious places I have temporarily called home over the years.
First, though, a weekend in my own home, which I plan to spend on the sofa, occasionally getting a big bag of ice out of the freezer, putting one cube into a glass of single malt scotch and the rest of it into a bag underneath my foot.
(Seriously, my big toe looks like somebody’s been practicing prison tattoos on a sort of dwarf aubergine. It’s horrific.)
"“Like Somebody’s Been Practising Prison Tattoos on a Dwarf Aubergine”" was posted by Dylan Beattie on 15 May 2026
•
permalink
Don't Reinvent The Wheel: Use What Works
Posted by Dylan Beattie on 09 April 2026
•
permalink
“Your scientists were so preoccupied with whether or not they could, they didn’t stop to think if they should.”
When Jeff Goldblum’s rock star mathematician - sorry, chaotician - spoke those immortal lines in Jurassic Park, none of us had any idea how the craft of software development was going to unfold over the next few decades. It was 1994. The world wide web was a handful of academic websites scattered across university servers, Jeff Bezos was on Usenet looking for C++ developers who knew HTML, corporate software was COBOL terminals or Visual Basic on Windows 3.1. There was plenty of free software around, if you knew what to do with a tarball and a makefile, and a few intrepid early adopters were running GNU operating systems built around Linus Torvalds’ Linux kernel, but the term “open source” didn’t exist yet. There was no Java, no .NET, no Python, no JavaScript, no cloud, no AI.
Three decades later, it turns out Dr Malcolm wasn’t just talking about cloning dinosaurs – not unless the dinosaurs in question are authentication frameworks, object mappers, message queues, and cloning them is building your own version ‘cos corporate won’t pay for a license – but look back at your own career, your own projects, and ask yourself: how many times have you built something because you could, without stopping to think whether you should?
I’ve been working as a professional developer for almost as long as Jurassic Park’s been around. I learned HTML in 1992, I started building data-driven web apps in 1996 - classic ASP, VBScript, ADO DLLs and Microsoft Access databases - and I’ve been solving problems with code ever since.
At least, I honestly believed I was solving problems… turns out that sometimes, I was creating more problems than I was solving. Not immediately, of course; me & my teams were cranking out useful features, keeping customers happy, and generating revenue. We liked it. Customers liked it. The Business liked it. One of the thing The Business really liked was when we’d evaluate some expensive library, or package, or software-as-a-service platform, and go “no, that’s way too expensive. We can build our own” - and we did. I’ve probably built half-a-dozen homebrewed customer databases for companies that didn’t want to pay for CRM. I’ve built email clients, marketing tools, content management systems, object-relational mappers, authentication, authorization… one time I even figured out how to use a SQL Server database as a message queue, ‘cos hey, we were already paying for SQL, right? Might as well use it! (The secret is WITH READPAST, if you’re curious.)
Folks, when I talk about “me & my team” here, this is definitely one of those “share the credit, accept the blame” situations. On just about every team I’ve worked with, I’ve been the one making the decisions. I’ve been lucky enough to work with a lot of really smart, capable developers, who built the thing right, and on the occasions it turned we hadn’t built the right thing? That’s usually been on me.
Now, I’m not going to lie. I learned a lot building all those things, it gave me a deep appreciation for the complexities - and the difference between building something that “works on my machine”, and something that’ll work in production across a dozen nodes in a server farm, 24/7, for years at a time. But turns out that homebrewed everything really isn’t a great idea when it comes to what they call TCO - total cost of ownership.
In most cases, the initial build took a couple of weeks: we’d crank something out, get it into production, and move on to the next thing. But then, somewhere down the line, the thing we built would break. Or it’d start to creak under the volume of traffic, concurrency issues, deadlocks. Or we’d just need to add new features - not cool, innovative features we could charge more money for. Boring features. New file formats. Unicode support for localization - stuff that “the business” obviously thought should have been there from the beginning, even though nobody had ever asked for it.
And, because all the software was ours, the only people in the world who knew how to fix bugs and add features were… us. We couldn’t just install the latest version, or upgrade, or outsource. Sure, we hired more developers - but it’d take them months to get up to speed on our codebase’s quirks and idiosyncrasies.
Imagine if we’d built those apps around established open source components and libraries. Senior developers and contractors could have hit the ground running, and be pushing new features to production way sooner. Baseline features like file formats and Unicode support wouldn’t be down to our team - or if they were, the developer who implemented it could submit those changes to the upstream project, which benefits the entire community and looks pretty good on their CV when it’s time to move on to the next thing. And junior developers aren’t spending their time learning homebrewed abstraction patterns and in-house workflows; they’re learning skills, patterns and practises that will stand them in good stead throughout their career.
Over many, many years, I came to realise something: every release, every line of code, every day that my team and I spent working on stuff, should be building things we can sell. Call them what you want: strategic differentiators, special sauce… the stuff our customers can’t get anywhere else. Customers aren’t dealing with us ‘cos we’ve got a fantastic login system, or a really cool message bus. They’re dealing with us ‘cos we’re the best place to go to find acting jobs, or conference venues, or machine tools. And if you want your dev teams focused on the special sauce, everything else has to be as ordinary, as predictable, as boring as possible. You need usernames, passwords, identity management? That’s a solved problem. You need to synchronise data across multiple regions and time zones? That’s a solved problem. You want resilient messaging? That’s a solved problem.
For me, that was the first milestone on the road to engineering maturity. The realization that, no matter how fun and interesting it’ll be to build my own, it’s probably the wrong answer; that my time and energy will be better invested in learning how to integrate and deploy an established solution that solves the problem. It helped that a lot of the time, that solution was free. Free as in free beer, free as in free speech - grab the code, install the package, configure it to do what we need, and get back to building stuff.
And so, over time, we switched from building our own data access layers to using NHibernate, Linq-to-SQL (hey, it was a long time ago!), and Entity Framework. We replaced our SQL-based message queues with EasyNetQ and NServiceBus. We moved from hosting on-premise, to a private cloud, to Amazon Web Services. It wasn’t always plain sailing, but over time we ended up spending a lot less time reinventing common infrastructure, and a lot more adding features our customers wanted.
The second milestone for me was the realisation that, sometimes, the best engineering solution isn’t going to be free. You know that feeling? When you click the “Pricing” tab and you think “oh, boy, that’s a lot… I’m going to have to get approval for this” Most of us didn’t become software developers because we wanted to sit in budget meetings; we became software developers because we wanted to, y’know, develop software. But, with the benefit of a great deal of hindsight, on almost every occasion that we hacked something together rather than spending money? Yeah. We should have done the analysis, created the business case, and spent the money.
There’s a tendency to think of developer time as free - after all, your dev team is going to get paid anyway; it’s not going to cost you any extra to have them build an in-house login system. That’s completely the wrong way to look at it. It’s not about build vs buy. It’s about what they could be building instead - and how much you’ll be able to sell it for. You can spend two months building a login system - or you can buy a login system that works and get the dev team working on the features for the new Platinum membership tier, ship that two months earlier, and look at that - Platinum membership revenue just paid for the new login system and then some. You might even get a bonus.
When I start working on an unfamiliar codebase now, the first thing I do is look at the dependencies. Which packages and libraries does it use? Where’s it hosted? How does the data access work?
If all I see are two dozen .NET projects with namespaces like MyCompany.Data.TableMapper? That’s a bad day. It’s going to be uphill all the way.
If I see a list of familiar services, names like AutoMapper, IdentityServer, NServiceBus, MassTransit? That’s a good day. I know those projects. I’ve used them, I trust them, I know where to find the docs.
If it turns out there are paid support contracts & maintenance agreements for those dependencies? That’s a great day. It means somebody else knows what’s going on, they’re getting paid to care about my problems, and they’re ready to help if I need it - and I get to focus on the special sauce.

That’s all a very roundabout way of saying that a bunch of us have got together and created a thing - the Use What Works initiative. It’s a collaborative project intended to encourage, and support, more constructive conversations around sustainability in open source software.
The first iteration is live at https://usewhatworks.org/ now. Swing by, take a look, let us know what you think. If you like what we’re doing and want to put your name on it, there’s a link to sign the manifesto. If you’ve got a scenario or a question we haven’t thought of, give us a shout. We’d love to hear from you.
"Don't Reinvent The Wheel: Use What Works" was posted by Dylan Beattie on 09 April 2026
•
permalink
Plus ça Change... Plus c’est la Même Chose
Posted by Dylan Beattie on 08 April 2026
•
permalink
It’s 2007. I’m working on a big rewrite (yes, I know) of a big system; a database-driven web app built in C#. A significant part of the project is just the code to get data in and out of the database. Object-relational mappers are still very much in their infancy; somebody’s ported Java’s Hibernate project to .NET but it’s a little rough around the edges and involves quite a lot of XML. But no worry - I’ve found this amazing tool called CodeSmith. CodeSmith can generate C# code based on your database schema (It still exists - it’s called CodeSmith Generator now). I start using CodeSmith to build a template-driven data access layer. Build the perfect DB schema, generate C# classes for every table with built-in persistence logic… this is gonna save so much time! Don’t worry about the frontend, validation, business logic - once the data layer is in place, all that stuff is gonna be a walk in the park. Let’s get the data layer sorted first. Days pass. Weeks. A month. Two months. I learn about cursors and table locks. I learn about something called a topological sort, to ensure that complex data operations involving foreign key constraints can be applied in the correct order.
I have a couple of prototypes and proofs-of-concept, but nothing that will form the basis of a working product. Nothing to show potential customers or stakeholders… but that’s OK. When this thing works, it’s going to be amazing; just iron out the last few glitches and then everything else will magically fall into place…
…what’s that? I should put the magic tools away, take what I’ve got, and just do the hard work to turn it into something we can actually launch? Don’t be ridiculous. It’s nearly done!
(It wasn’t nearly done. It was never done. The project was cancelled after six months, without ever shipping a single line of code.)
It’s 2026. I’m using Claude Code. I’ve got a prompt file - ANALYST.md - that makes Claude ask me questions about what I’m building. The analyst prompt generates REQUIREMENTS.md. The requirements look good. They look very good; at a cursory glance, they’re better than any set of requirements I’ve ever seen from an actual client. I feed REQUIREMENTS.md to the ARCHITECT.md persona. There are more questions. It creates a SPEC.md and a PLAN.md. I fire up a pair of agents, DEV.md and QA.md. Dev writes the code. QA reviews the code. I run the result. It’s not quite right. I missed something in the requirements. Something obvious, but I didn’t mention it and ANALYST.md didn’t ask. I fire up the analyst again. We have another chat. The requirements get updated. I fire up the architect. It reviews the new requirements. The plan and the spec are updated. The agents go another few rounds. I review the result. It’s still not right. Sure, it says it’s monitoring the filesystem for changes, but it isn’t. Back to the requirements. Did we miss something? Is this a problem for the analyst? Is it architectural? Did the dev agent miss something? Did the QA agent miss something? I’m not sure. Back to the beginning. Round and round and round we go…
I’ve been doing this for a week now.
I have a couple of prototypes and proofs-of-concept, but nothing that will form the basis of a working product. Nothing to show potential customers or stakeholders… but that’s OK. When this thing works, it’s going to be amazing; just iron out the last few glitches and then everything else will magically fall into place…
…what’s that? I should put the magic tools away, take what I’ve got, and just do the hard work to turn it into something we can actually launch?
Don’t be ridiculous.
It’s nearly done!
"Plus ça Change... Plus c’est la Même Chose" was posted by Dylan Beattie on 08 April 2026
•
permalink
How to Find the Stories
Posted by Dylan Beattie on 31 March 2026
•
permalink
One of the folks who joined my presenter workshop last week (which was awesome, by the way!) emailed me this morning with a follow-up question:
I first saw you speak at DDD South-West in Bristol (it was the “There’s No Such Thing as Plain Text” talk), and what stuck with me was your use of stories. They were interesting, quirky, and naturally interwoven with your talk. I try to bring elements of this approach into my own talks by focusing on “what will make people feel something?”, before getting into technical detail.
I work at […] a FinTech that largely serves the Business Travel industry (virtual cards for managing corporate spend). I’m currently searching for stories that (at least loosely) connect to our industry. The aim is to give a talk at one of the business travel conferences over the next year. It will inevitably touch on how AI is transforming our industry, and I’m comfortable talking about how [we are] using AI within our product set, but I’m aware of the importance of framing all of this with a story.
I’ve trawled through many industry “News Outlets” (who are largely just selling adverts with a sprinkling of text) but haven’t yet found the kind of inspiration I’m looking for. I would love to be able to call the talk “The Suitcase that Abandoned its Owner”, or “The $10,000 Uber Trip” - something a bit whacky that intrigues an audience.
First of all: excellent question. Technology as a positive force in the world is most effective when it’s solving actual problems that real people have… and people love to talk about their problems. Especially if they’re interesting problems that happened in strange places. You want engaging stories about weird things that happened to international business travellers? Talk to some people who travel internationally for business. You’re guaranteed to get a couple of good stories – and along the way, you’ll probably learn a lot of really valuable things about exactly what your customers are trying to do, and how your product can help them.
That’s true of just about every industry, by the way: the closer your developers are to your customers, the more likely they are to make the right call when facing any one of the hundreds of decisions that inform the way their software gets built.
So let’s kick things off with two fun stories of my own that I think fit the brief, and who knows, maybe a few of you can share some travel stories of your own in the comments.
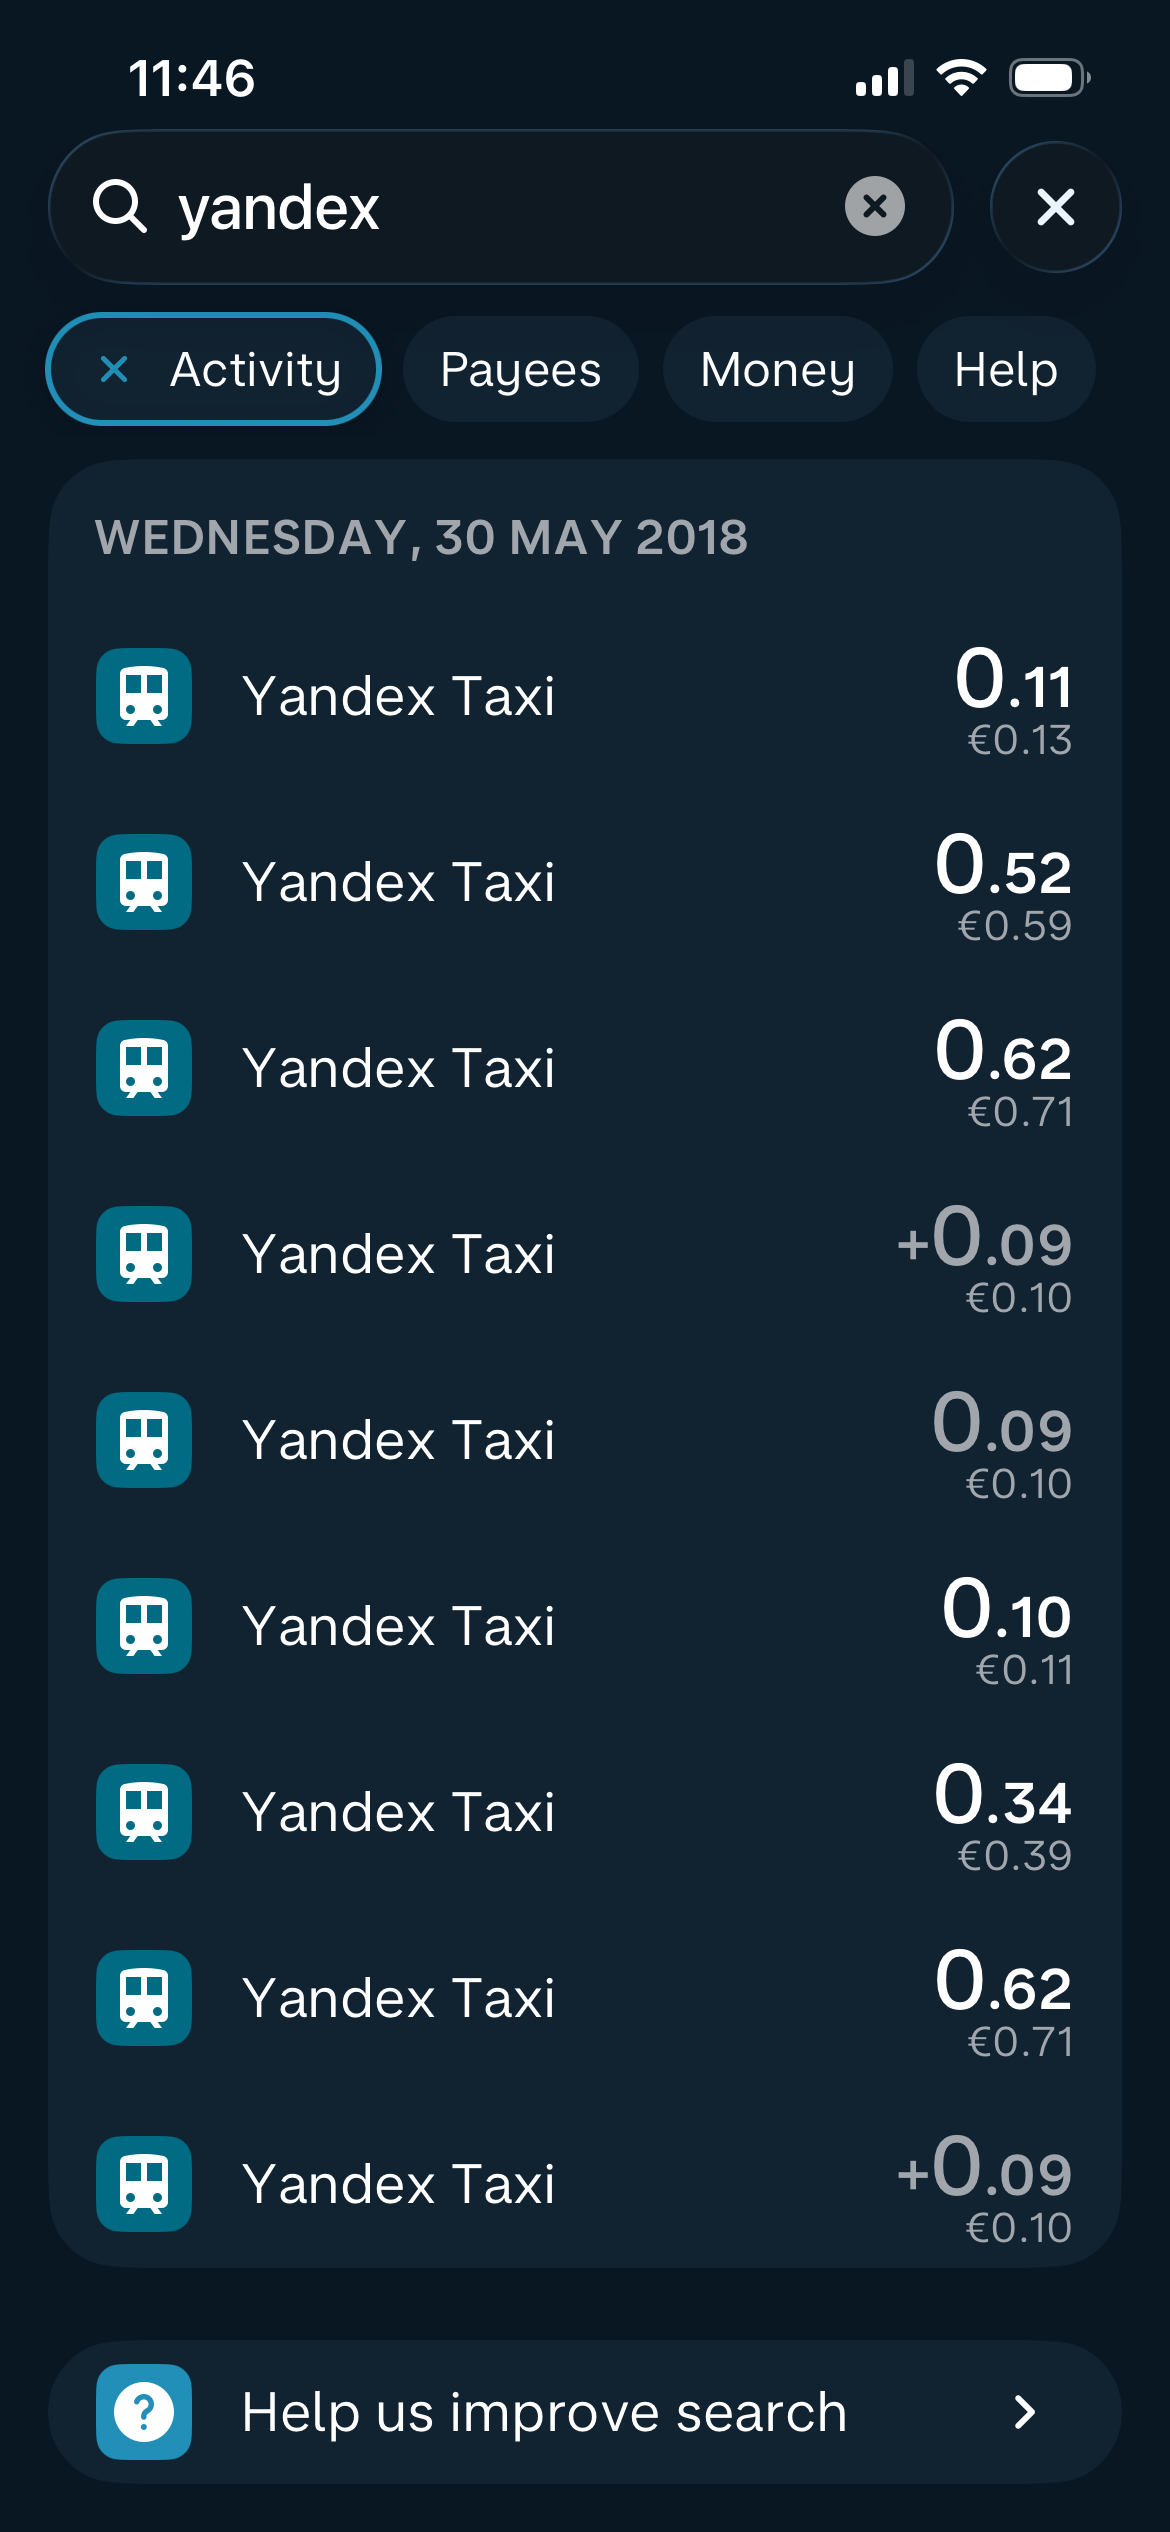
The first one happened in Riga, Latvia, back in May 2018. I’d been at DevDays, and was on my way from the conference venue to the ferry terminal ‘cos I was catching the overnight ferry to Stockholm for DevSum. Yandex Taxi had just rolled out in Latvia - kinda like Uber, but built in Russia. Yandex is like Russia’s answer to big tech… it started out as a search engine, added food delivery, ride sharing, email hosting, basically copying all the things coming out of San Francisco but built for the Russian market.
So I get a Yandex Taxi. It works exactly like Uber, except a minute into the ride my phone pings. I’ve just paid Yandex Taxi thirteen cents. A minute later it pings again - 52 cents. 62 cents. 9 cents. 10 cents. 34 cents. Ping, ping, ping, ping, ping… all the way to the terminal.
Weird, huh? But not actually a problem… just weird.
Then a few months later, I was in Moscow for DotNext (this being back in the days when going to Russia to talk about software development was a completely fine and normal thing to do) and I got talking to one of the developers who built the payment system integrations for Yandex Taxi! So I naturally asked “hey, what’s with the weird payment thing?”
Turns out Yandex had a huge problem with people ordering a cab using a virtual payment card and then cancelling the card en route, so the driver would drop the passenger at their destination, the passenger would run away, payment gets declined, driver has no recourse. So the solution? Charge the card every minute - so if a payment gets declined, the driver can kick the passenger out right there. Not a bad solution - but combine it with Monzo, the bank and app I use when I’m travelling, which has realtime notifications every time I make a payment, and you’re getting ping-ping-ping all the way to your destination, for what are often comedically small amounts of money. I guess it all adds up.
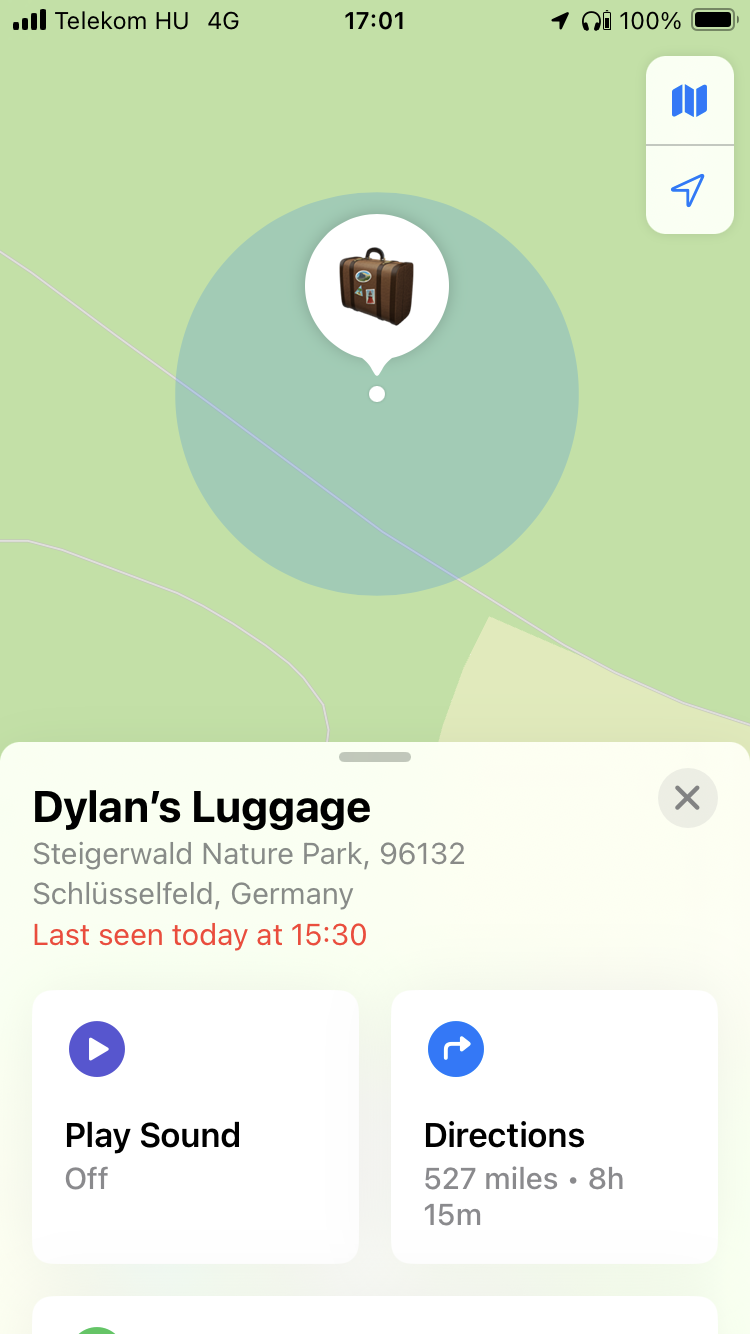
The second story happened in 2024, en route from Hungary to Lithuania. I’d been in Budapest speaking at Liferay DEVCON, and had a very tight connection via Munich on my way to Vilnius for BuildStuff… first flight was delayed. A 90 minute connection became 60, then 45, then 30… by the time we landed, I had six minutes to make the connection… but, whether by accident or design, we parked right next to the gate for my connecting flight, no passport control, and I made it. My luggage did not.
No big deal. I’ve got an Apple Airtag tracker in it. When we landed in Vilnius three hours later, I could see my luggage was still at Munich airport, so I filled out all the forms and whatnot, told them where I was staying; no problem. Next day after breakfast, I checked Apple’s “Find My” app… and there was my luggage, somewhere in Bavaria, in the middle of the forest, miles away from anywhere.
Apple’s “find my device” network basically turns every iPhone on the planet into a node in a huge geolocation network, so I’m guessing what happened is an iPhone on board the plane could see my luggage’s tag, and it was connected to the inflight wifi (or a cell tower) just long enough to register a location as the plane was flying over that particular spot. (Yes, I know the Steigerwald Nature Park is not actually on the way from Munich to Vilnius. No, I don’t know either.)
But according to the app, my suitcase spent a nice relaxing morning chilling out next to a little lake in a German national park, and then teleported itself to Vilnius airport, and was delivered to my hotel a few hours later.
What are your weirdest tech travel stories, dear readers? Share them in the comments (yeah, I have comments now!) and who knows, they might end up in a conference presentation.
"How to Find the Stories" was posted by Dylan Beattie on 31 March 2026
•
permalink
Look, Sir! Comments!
Posted by Dylan Beattie on 31 March 2026
•
permalink
So I got an email earlier, which you’ll find out about in my next post, which made me think “hey, the reply to this would make a great blog post”, and then I thought “…and it would be even better if people could add their own comments to it”, and so I plugged in the rather excellent Giscus, so now you can leave comments on my blog posts.
Go on, try it. It’s all running straight off GitHub Discussions, so there’s no database; it’s all client-side code, so there’s no server in the loop (well, there is, but it’s not mine so I don’t have to worry about it.)
"Look, Sir! Comments!" was posted by Dylan Beattie on 31 March 2026
•
permalink

1 comment — read or join the discussion